Making Marquesitas
Last Revised: October 19, 2023
Home
Vacationing in Mexico
Make Your Own Marquesita Maker?
My Marquesita Recipe Collection
Contact Us
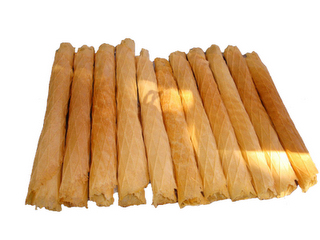
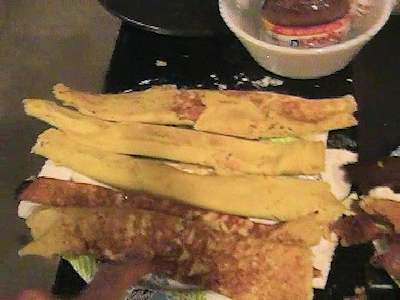
These Marquesitas are rolled up with the filling inside.
Most of the ones we saw on Cozumel and on Isla Mujeres
were folded in half after the fillings were applied.
Once the filling was applied, the half-size goodie was
rolled up and had a napkin wound around the bottom.
Introduction
We first heard about the Marquesita in February of 2010, as we were preparing for our annual trip the the Mexican Yucatan
Penninsula. Friends had recently returned from there, having fallen for their unique flavor and shape. They implored us to
get more information about them while we were there.
A history of the Marquesita
(Note of Tuesday 30 of May of 2006) The Marquesita, a history.
It was born to confront the fall of the (ice cream cone) sales at the time of cold. In a very cold season in 1945, the ice creams
stopped selling. And not to die of hunger, Vicente Mena Munoz, heir of traditional "Polito Ice cream", invented a
product with rolled {ice cream} wafer: marquesita, stuffed with ball cheese {edam}, manchego or cajeta {caramel}.
"My father prepared the ice cream wafers like my grandfather, Leopoldo Mena Bonilla, had taught him. In the search of a
product that helped to the economic situation, because the sale of ice creams fell too much as a result of the cold, it
ocurred him to coil the rolled wafer and to put meat and other things. Nevertheless, that product did not stuck",
remembers Vicente Mena Heredia, Polito Ice cream owner.
"When looking for a tasty combination, he added to the rolled wafer several products, among them daysi cheese and other
types of cheese. The combination of the rolled wafer with the ball cheese was the best one."
"The marquesita name arose as
a result that the word has a good ring and because the product had cheese", it continues. "When people left mass at the
temple of Santiago, they crowded to buy marquesitas". With the passage of the years, his father lost his sight and stoped
making the marquesitas. "But people requested the marquesitas to us and as they insisted we continued to prepare this
product", he mentions.
"When people asked to me, I told them that I did not like to prepare the marquesitas because they burned my hands."
"The rolled wafer of the marquesita is different from the one from the ice cream. It has milk, vanilla and a little almond,
to give a rich flavor", assures Mr. Mena Heredia. One of the problems is that his father did not register the invention of
the marquesita and, as the product got great acceptance, other people began to prepare this treat, but not with the same
flavor. "They can prepare them, but don't use the name Polito", he warns.
Thus the "marquesitas" arose in the yucatecan capital, those crunchy waffers stuffed with ball cheese or manchego, that
also have cajeta, and that pleases much particularly to the children. In "Polito Ice creams", the marquesitas are sold
to 12 and 16 pesos, the special one. - Claudia Ivonne Sierra Medina
The Polito Ice Cream parlor is located at Parque de Santiago, on the north side of the church.
How they are made:
You can see from the foregoing that the marquesita consists of a shell similar to a waffle cone and that it has a filling
applied immediately after the Marquesita Maker's top has been opened, before the shell has a chance to harden.
Here is a simple picture essay of the making of a Marquesita:
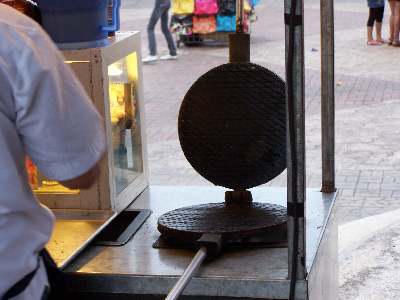
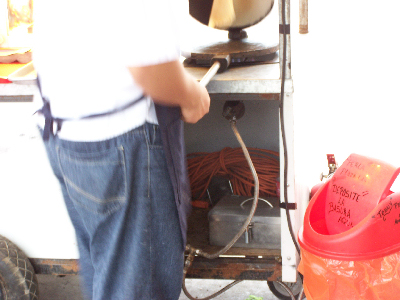
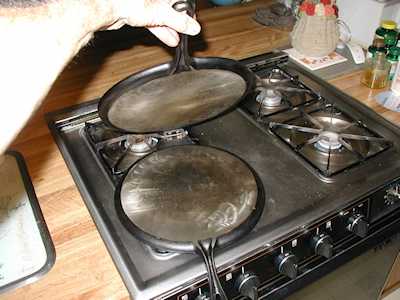
The Marquesita Maker is about 12 inches in diameter. We have seen several different types. Some appear to be made of cast iron, as
this one is. Note the long handles. There is a large propane burner several inches below the bottom of the Maker. My guess it
that it is about well over 50,000 btu in output when on full. They seem to keep the burners on pilot. Once they have been
cooking for a while, the whole Marquesita maker is hot.
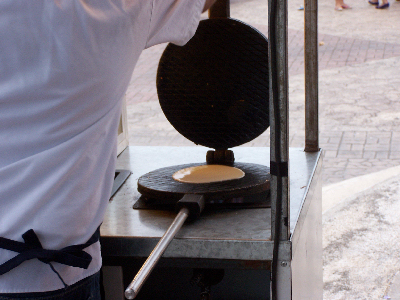
When they start a new one, they first spray both halves with Pam or, as one guy did, rubbed a stick on lard on both sides.
Then the operator turns the heat on full for about 35 seconds or so. Heat back to pilot.
Let it cook for 30 seconds or so and check.
The Marquesita seems to stick to one side of the maker or the other during this process.
Operator gently scrapes the "crepe" loose before
its so well cooked that it won't stick back together. Recoats the spots where sticking occurred with Pam.
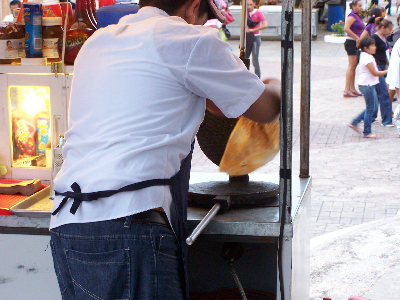
After another look-see, he loosens the "crepe" again and turns it over to complete the cooking. Note that he turns the "crepe"
over, not the Marquesita Maker.
Operator opens the Marquesita Maker up when the "crepe" is a light brown, but not stiff!!!. Quickly folds it in half, butters
it with the selected topping (I like Nutella) and adds sliced bananas (my favorite). There are many other concoctions that can be used.
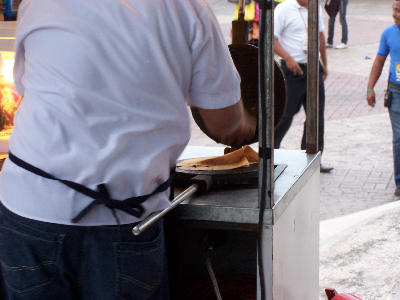
Now, still moving rapidly, the operator rolls the "crepe" up and adds a napkin. This has to happen pretty quickly, before the
shell can harden.
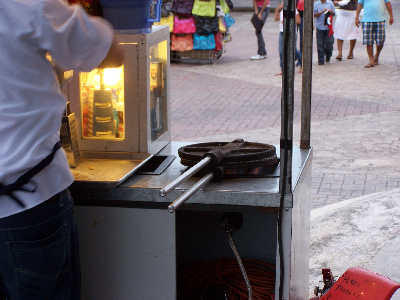
Note: All the cooking has been done with only one side of the Marquesita Maker toward the fire. Now, just before starting
the Marquesita, he turns the Maker over. He can do this because there was a lot of heat built up in the lower (now the upper)
half.
My Homemade Marquesita Maker Experiment
Getting Started; October, 2018:
We have been trying to locate a source for the Marquesita Maker on and off for the last few years with no luck so far.
A friend attempted to make one from two pieces of 1/4" thick plate steel, but it warped and didn't heat evenly.
Yes, you can buy 6 inch diameter "Ice Cream Waffle Cone Maker" (Amazon, about $23.00), but its just not the same as a real Marquesita.
I gave some thought to using a pair of 3/8 inch thick by 12 inch diameter steel plates, but was still worried about stability,
so I thought I might weld a half inch square ring around the edge, but hadn't gotten to it yet.
Then, a few weeks ago, an advertisement for a "Basic Essentials Cast Iron 12-Inch Round Griddle with Assist Handle" appeared on my screen.
It was from Bed, Bath and Beyond.
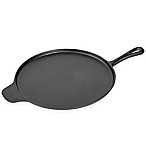
I saw that the bottom was flat and it appeared that if I put two of them back to back and hinged them together, it might actually work!
So I ordered two of them for about $35.00.
I polished the bottoms of the two skillets when they arrived and constructed, then attached, a special hinge.
Here's what it looks like so far:
I haven't cut the diamond shaped grooves into it yet and I haven't tried it out.
If it does make decent Marquesitas, then I will cut the grooves.
And, I will update this page with some construction details after I cut the grooves. I may even extend the handles with some insulating material if needed.
October 17, 2018:
Now the grooves have been cut and several other issues has been resolved.
Here's our video story of the whole thing, including info and pictures of our first two tests:
October 29, 2018:
Here, we make another test of our system. We learned that we need a bigger burner to get moer even heat, so we moved out into our garage and fired up a propane
"Turkey Cooker".
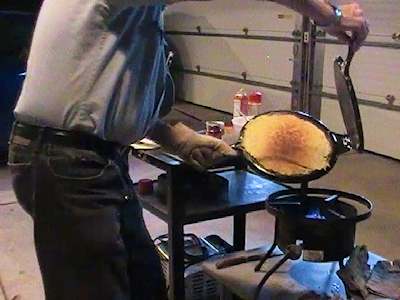
Here above, you can see that we are getting closer
We still need to improve heat distribution, but this video shows that we are almost there.
By the way, our "Double Skillet" Marquesita Maker's working face is 10 3/4" in diameter. We are still adjusting the amount of batter that is ideal for this size
device. We have looked at many recipes for the batter. Many of them are actually for making Ice Cream Cones, which are usually made from 6 inch diameter "crepes".
So far, we are still using the recipe that we described in the first video. That one says to use 4 tablespoons of batter for each 6 inch ice cream cone.
We have been using about 6 tablespoons of batter up till now.
But, if we
scaled that amount up to 10 3/4 inches, we'd need 12.8 tablespoons! Next time we wiil expirement with
increasing amounts of batter.
November 4, 2018:
We made a few changes to the burner and to the process, then made 8 Marquesitas in 24 minutes. Three were pretty dark, but 5 weren't too bad.
We Still have a couple of issues to work on, but we CAN make them, using our own homemade Marquesita maker!
I have already made a bunch of notes about minor changes for our next run, but it is getting pretty cold out in the garage where we are doing the cooking.
So it might be a while before we go at it again. I suppose I could bring the cooker into the kitchen, tho, couldn't I?
November 30, 2018: Here's the recipe that we are currently using:
Marquesita Batter Recipe used for all but the first test, and up till about 11/29/2018
This, like most others that I found, was for making 6" diameter Marquesitas, not "REAL" ones.
It said that it makes 8.
Note:This recipe only makes about 4 10 3/4" diameter Marquesitas,
so I make a double size batch and it produces about 8 Marquesitas, using about 8 Tablespoons of batter for each one.
2 Whole Eggs
1/2 cup White Sugar
1/4 cup butter, melted and cooled
3 Tbsp Milk
1/2 tsp Vanilla Extract
1/3 cup all purpose flour
1/8 tsp Salt
-Whisk together eggs and sugar in a large bowl until frothy.
-Whisk in the butter, milk and vanilla.
-Gradually whisk in the flour and salt until smooth.
-The batter should be thin; you can stir in more milk if needed.
-!!! Let it rest for a couple of hours before using it.
Batter for each Marquesita: We used a 2/3 cup measuring cup, filled to about 1/4 inch from the top for each one.
----------------------
Note:
This recipe works pretty well. These Marquesitas DO harden up, unlike the Rick Bayliss recipe which didn't (not for us, anyway).
April 15, 2020:
A whole year plus has gone by and we did do some real important upgrades to the system. The main improvement is to add a pressure gauge to
the propane regulator and to improve the fuel lines. We quit testing in November of 2018 because it was too cold in the garage. Now we are waiting for
warm weather again. We planned to to more testing when the couple that used to travel to Mexico with us came back from Florida, but now, we have to put it
off again because of the corona virus. I keep collecting recipes and watching every new Marquesita youtube video. Always trying to get a better handle on
the exact way to run the burner. Those folks in Mexico seem to have a real knack for simply turning the burner UP and then DOWN at just the right time.