A Pocket Knife Planimeter
Or "Finnish Planimeter"
Last Revised: October 21, 2023
French Creek Valley Home
Back to Blacksmithing
Contact Us
Introduction
What is a "Planimeter"?
A planimeter is a mechanical instrument used to compute the area of a planar region. These planar regions could be lakes
on a map, plots of steam engine cylinder/valving efficiency, etc..
The Pocket Knife Planimeter:
A senior engineer at 3M(Earl Hoyne)once explained how to use a two-bladed pocket knife as a planimeter,
an idea from someone in Finland.
You need a knife that has one blade pivoting from each end of the handle. Usually, one blade is longer than the other.
Make sure that the longer blade is pretty sharp. If this is not the case, the blade may skid sideways, making the readings
inaccurate and nonrepeatable.
If the blades of your knife both come from a common pivot point, it won't work.
Here's how to use it:
Tutorial Setup:
-Get a scale plan view of the surface whose area needs to be determined.
(Once you see how the system works, you will do your measuring right on an aerial map)
-On that plan, locate or draw in scale, a rectangle of some size whose area you do know.
The area of this rectangle should be about the size of the surface to be evaluate. Plus or minus 50% is fine.
To illustrate this process, I drew 2 shapes with my CAD program and printed out that page. One is a square and the other is an irregular polygon.
Using the tools in the CAD software, I can measure the areas of both polygons, and I did that. Pretend that one sqaure
inch equals one acre.
Here is that page. We will see it again, with knife in action as the process moves forward:
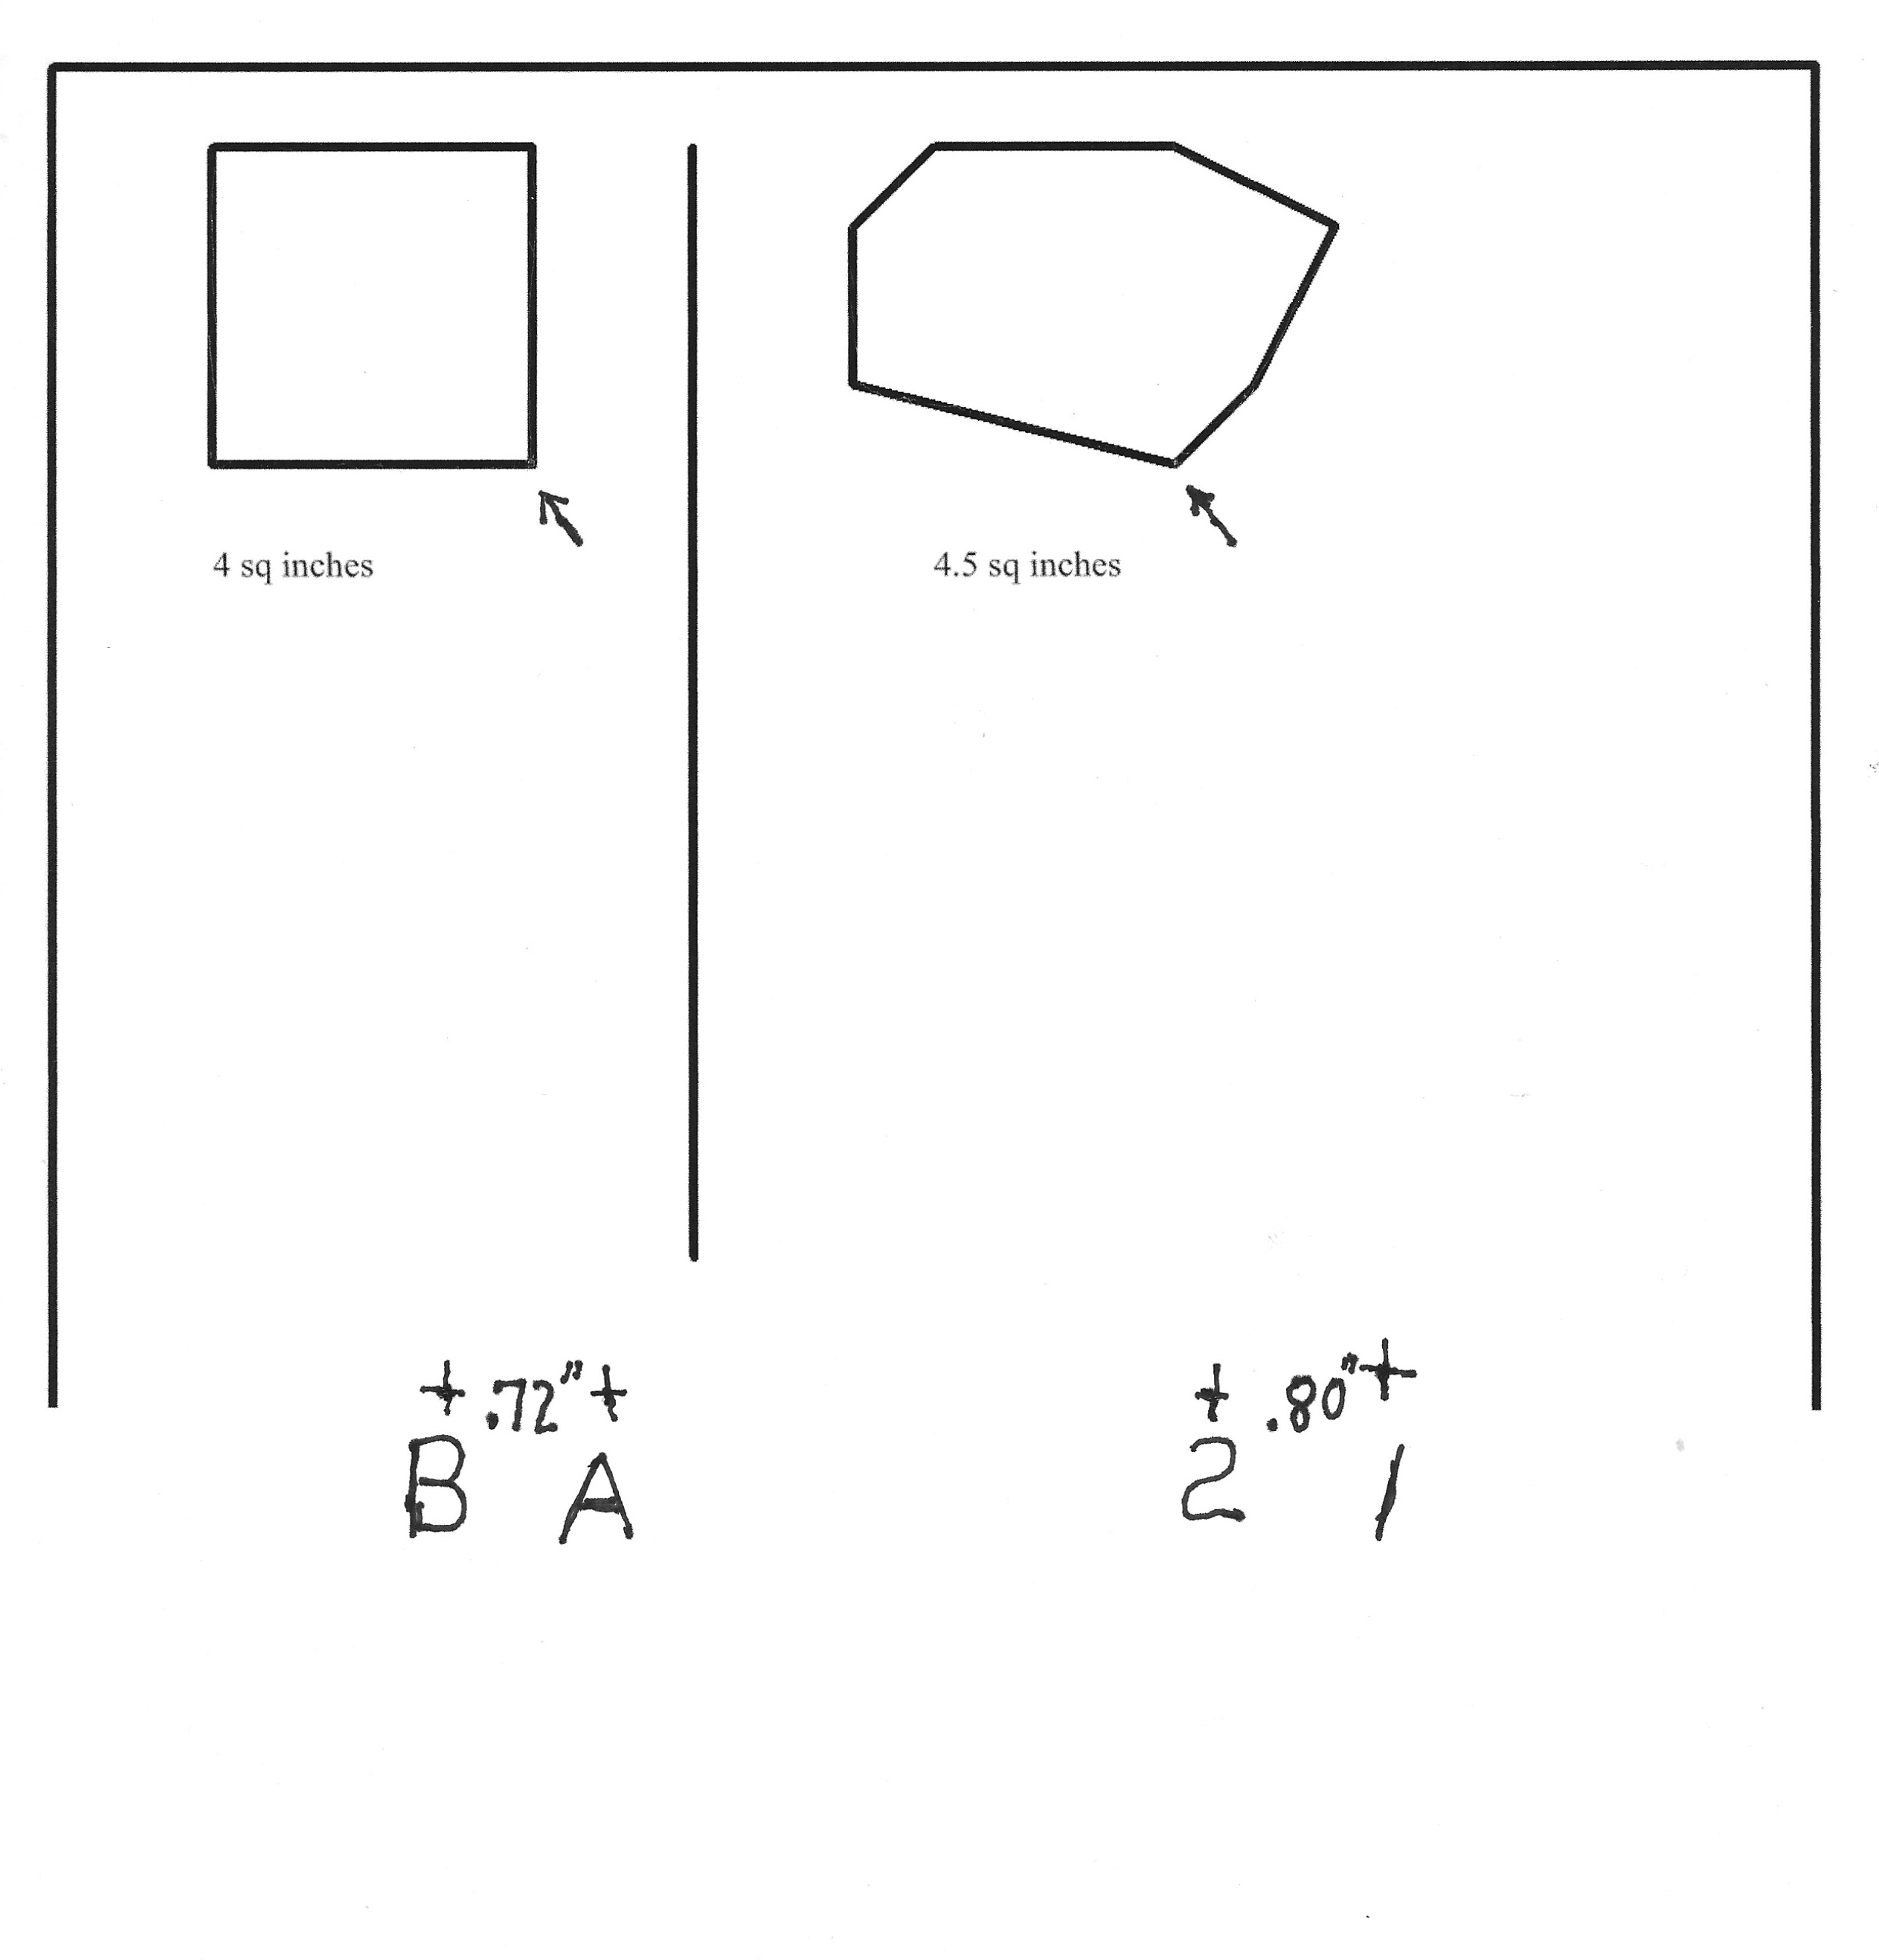
The distance A-B is the calibration distance that equates to 4 sq. inches and the distance 1-2 is the planimeter's result
for the "shape of interest"
Now you are ready to determine the area of an "unknown" shape.
Example:
For this example, I simply made a aquare on a sheet of paper, but with an aerial map, you can pretty easily see the bounds of 40 acre field
or even a quarter section, if needed.
I want to measure the area of a farm field. It is irregular in shape. Back in 2010, the Farm Service Agency give me an
aerial printout of the section that contains my field.
But, of course, these days, you can simply print out the same sort of aerial view from Google Maps.
It is easy to see on the printout, the perimeter a 4 acre field.
So, on my map, I can also see the boundaries of the field of interest to me and a reference field.
-Open the large blade of the pocket knife completely.
-Open the smaller blade so it makes an angle of anywhere from about 60 degrees to about 100 degrees with the
handle of the knife.
A larger angle will give you better resolution (a longer calibration line), but a smaller angle will give you
a shorter calibration line, which won't take up as much space.
-The tip of the small blade will become the pointer to be used in tracing the outline of the shape whose area is
to be measured.
Calibrating the setup:
-Stand the knife up on the tip of the small blade, with its point touching a corner of the scaled
rectangle (it has a known area, right?). This will be the "Start" point.
-Position the knife so the cutting edge of the large blade will be contacting the printout someplace.
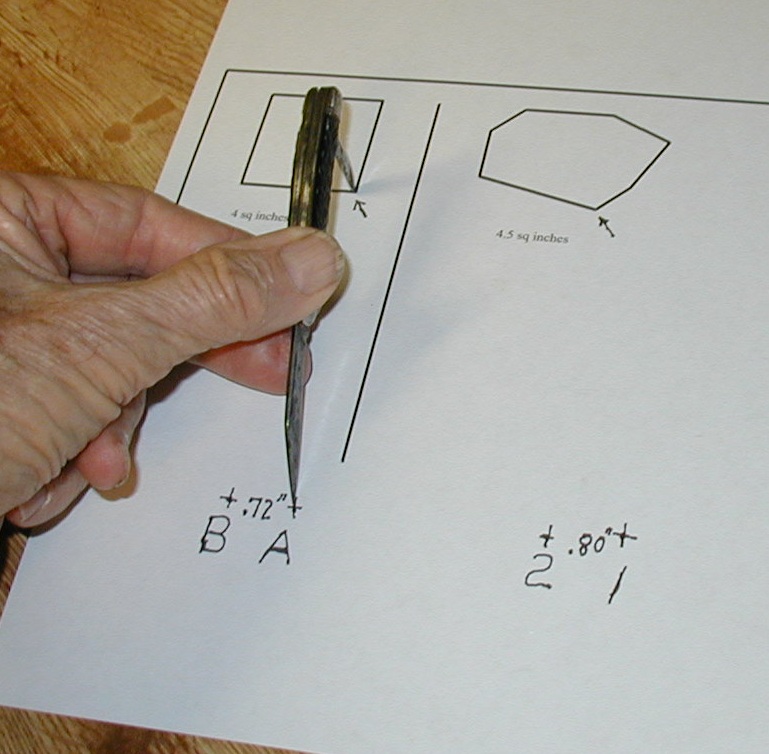
With a sharp pencil, make a single point on the printout, exactly at the tip of the large blade (Point "A" on my
printout).
NOTE: During the rest of this process, it is important that the blades don't move in the knife pivots.
-Now slowly move the pointer end of the knife along, tracing the perimeter of the rectangle.
As you do so, the cutting edge of
the large blade will go back and forth, but must not slip sideways. Go all the way around the perimeter.
You will see that the ANGLE of the back and forth motion of the large blade changes the direction that the end of that
blade moves, similar to the action of parallel parking of a car. There, you are driving the car back and forth, but
the net result for the back wheels is that they simply move sideways from their starting position.
-So, now that you have returned to the starting point of the (calibrating)rectangle, having traced around the whole shape,
the tip of the large blade will have come to rest in a different location (Point "B" on my printout).
Mark this point with the sharp pencil. Carefully measure this distance. This is the calibration of the printout, for the
exact opening that you set for the knife blades.
-Now, do the same thing for the Shape of Interest.
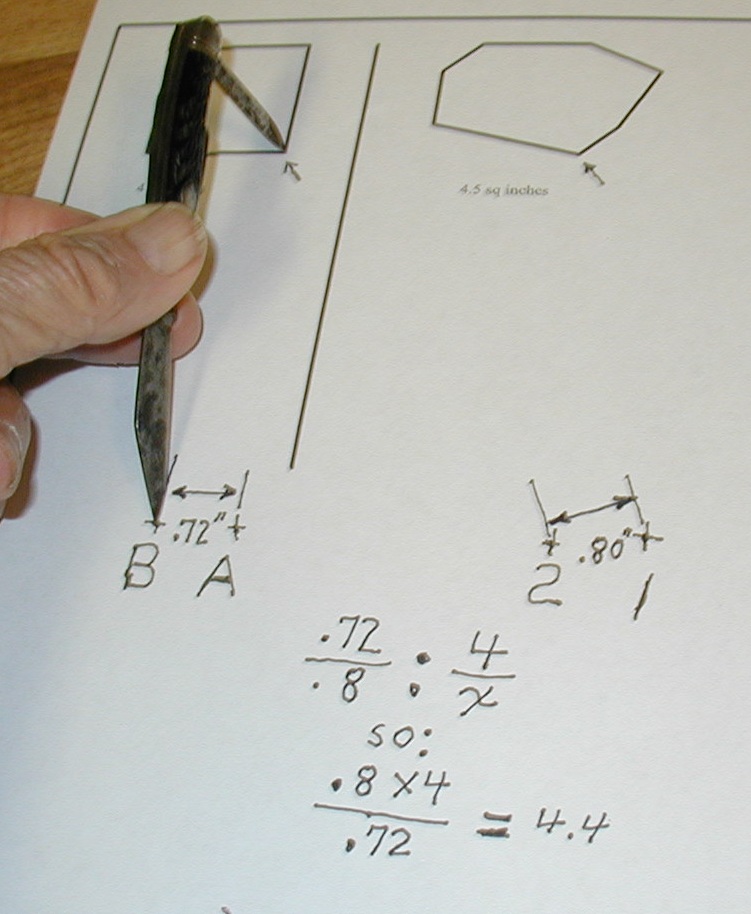
Develop Points "1" and "2". Carefully measure the distance between those 2 dots.
-The two areas are directly proportional to the 2 distances, A-B and 1-2.
-So, if the distance between my calibration marks was 0.72" (for a known 4 acre field) and the distance between
marks on the subject field was 0.8", then a simple proportion shows that my subject field has an area of 4.4 acres.
That's pretty close to the CAD software's measure of 4.5 acres!
Please do contact me if this process doesn't seem well enough defined.
Here's a link to a better description of simple planimeters than I have given here:
Prytz Planimeter