I have been making "square" nails by hand since about 1986, off and on.
Maybe 400 or 500 nails in my entire career as a hobbyist blacksmith.
I learned from a short article that Tom Latane' had published in "The Metalsmith" newsletter of the Guild of Metalsmiths in the
late '70s or so. Most of the time I am making them as part of a demonstration to the public. I often make 3 nails just to
get "warmed up". Years ago, other blacksmiths used to criticize me for making something so simple and easy to do, but
when Peter Ross demsonstrated for us at the Guild of Metalsmiths conference in the late 80's or so, he told us that, at
Colonial Williamsburg, they didn't let apprentices make nails until they had been there several months, maybe even a year or
so!.
He then proceeded to show us the finer points of nail making and the high degree of hammer control and practice that it takes
to make good, repeatable nails quickly.
So now I don't get the hassle anymore.

As I make nails, I toss them into a jar marked "Nails: 25 cents each or 50 cents each, Straightened".
I do this because I read somewhere that folks who were cash poor would gladly buy the bent nails because they could
straighten them at home and save some money.
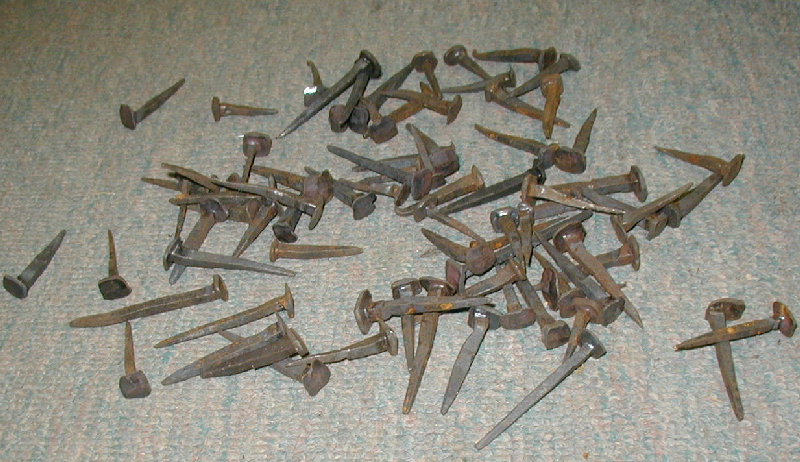
These nails are the ones that I haven't sold yet. People almost always pick through the jar and select the straightest nail
anyway and offer 25 cents. That's okay, I do it for fun anyhow. If you look closely, you can see that I usually make "4-clout" heads
on my nails. You can see just about every mistake possible in this pile. I still have trouble from time to time with the
nail sticking in the header. That's why you see at least one nail that has a kinked end from beating it on the anvil to get
it out of the header.

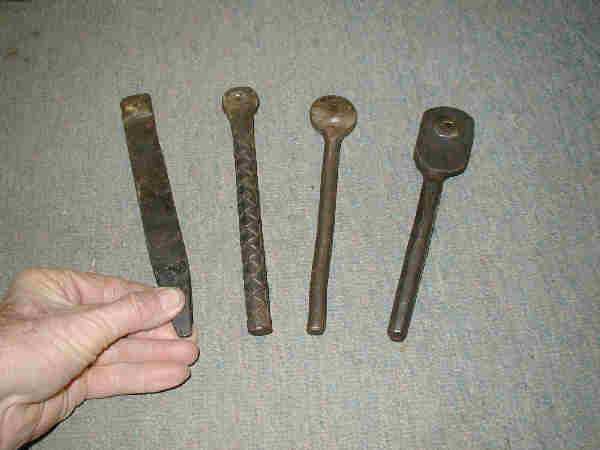
Here are some nail headers that I have made over the years. I made them from whatever hardenable steel was handy at the time.
The smallest shank size is on the left and the largest is on the right. The one on the right has been filed out so many times
to get "catches" out of it that it barely works with 1/4" nail rod anymore. The tapered punch that I use to taper the backs
of the headers is made from re-rod and has a taper of about 1 in 3.
Jay's approach to nail making is one of developing a productive process for turning out large numbers of nails to close
tolerances. He says that it took him about 6 months of making some nails every day to get "good at it".
He thinks his personal best ever was making 87 nails per hour.
He also commented that he knew someone who could do 230 nails per hour.
Most period (Williamsburg period) nails were rectangular in cross section, not square.
1/3 to 1/2 of the nail's shank should have parallel sides.
They are not to be tapered all along their length. Nails tapered all the way just fall out, unless clinched.
Jay says that "square nails" made properly hold better than round nails.
"Nails should be made in one heat; the head must still be glowing when it is shaped."
First step is to draw the stock to a point, then never hit it again.
Think in terms of the cross section of the nail rod when determining lengths of stock for shank and head.
Determine length of stock for shank, then shoulder stock on 2 sides and draw the stock between the shoulder and the point out
parallel just enough to fit header.
(learn to do this without having to check fit in header since that would waste time and heat).
Determine length of stock needed for the head. Jay usually uses one cross-section length for the head.
Once the head-stock length has been determined, nick 2 adjacent sides of the stock on an acute cold-cut hardy,
not the kind with one flat side. Learn to make the nicks ALWAYS on the same sides relative to the shank shoulders.
Jay nicks the same sides as the shank shoulders, but he says that Peter Ross nicks the sides opposite the shank shoulders.
Nick almost all the way through the stock. Note that this method of nicking leaves a point at the corner opposite the nicks.
This little bit of extra stock will be used to fill in the head, which at this point is off center.
Direct your first sliding "heading" blow at this point, drawing the point in the correct direction to center the head on
the shank.
Jay makes his headers from wrought iron with an oval-shaped W1 dome forge welded on top of the wrought iron stock
at the heading area. The wrought iron handle-stock is about 6 or 8 inches of 1/2 to 3/4 inch round or square.
The W1 piece is about 3/4" of 3/4" round.
After shaping the handle to his liking, he welds on the W1.
He drills or punches a small hole from the back of the header as a pilot hole. Then, after making an appropriate shaped
rectangular-tapered punch, punches it through from the back side just far enough to produce the required shape for the nail
shank's cross section.
The hole tapers larger just below the tip of the header. This is to assure that the nail won't stick in the header.
Some filing may be required to get the header to release the new nails properly. Obviously, a different header will
be required for each different cross section of nail needed.