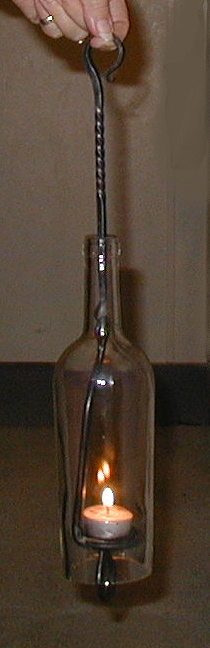
Wine Bottle Candle Lamp
Last Revised: October 19, 2023
French Creek Valley Home
Back to Blacksmithing
Contact Us
Introduction
I have made candle lamps of many styles. Usually they are of a traditional nature
but this one is probably of a more modern design.
To make this one, there are basically two parts:
-The metal mechanism that holds the candle and the chimney and
-The chimney itself, which, in this case is a wine bottle with the bottom cut out.
-This style of candle lamp use "tea light" candles. They have a soft glow, but don't emit much light, so it's best
to use clear wine bottles, or those that are only slightly tinted.
First let's look at the task of removing the bottom of the bottle:
I know there are several ways to remove the
bottom from a glass bottle, but here I will show the process that I use for making a clean
cut.
I learned this method several years ago at a blacksmithing conference is northern Minnesota. Sorry, but I
don't remember the name of the demonstrator. I have modified his process somewhat to obtain a cut that is much smoother
than the process he used.
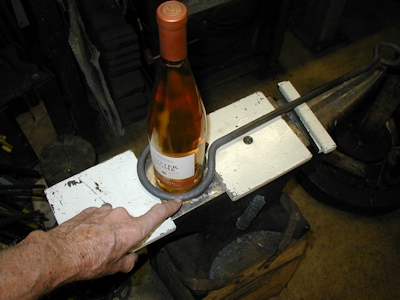
How the Bottle-Bottom-Cutting process works:
The general idea is to heat the tool until the large ring is at least at a good red or low orange heat. You then put the
fixture over the bottle, almost all the way to the bottom of it. Then you hold the fixture still and rotate the bottle
around and around,
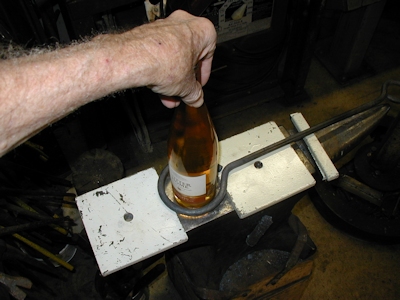
---with the edge of the bottle touching the inner part of the ring in one spot.
Once the bottle gets hot enough at the stress point you've created, the bottom simply comes loose with a small "tink"
sound.
-Now for the details that make the process work smoothly:
You need to hold the fixture very still vertically, so that only a straight line of heat is imparted to the bottle. If
you move up or down with the fixture while turning the bottle, the break won't be even and you will probably end up with
a chipped edge. To make it easy to hold the fixture still and at a constant height, I place 2 pieces of 1/2" thick stock
about 2" X 4" onto the anvil, just far enough apart so the bottle fits between them.
I chose 1/2" stock for a couple of important reasons:
1. You need to do the "cutting" a little ways above the bottle's bottom so you get a nice clean cut.
2. Some wine bottles have several little protrusions (glass bumps) sticking out down toward the bottom.
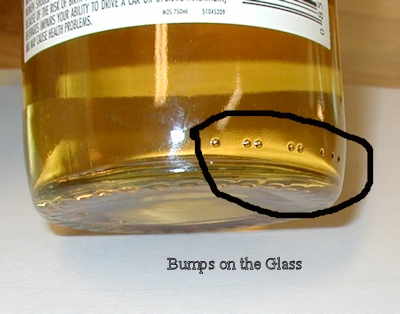
You have to do your cutting above those bumps, or the cut won't be clean.
If the tool appears to be cooling off in the spot where the bottle is touching it, simply move the bottle to another spot on the ID of the tool.
So, you are heating the bottle all the way around in one plane, only where the hot iron touches the bottle.
Be patient, and simply keep going 'round and 'round. It may take several complete revolutions to get the job done.
Now that you understand how to get the bottom off the bottle, let's make the fixture (tool) for doing the job.
Make the fixture for cutting the bottle.
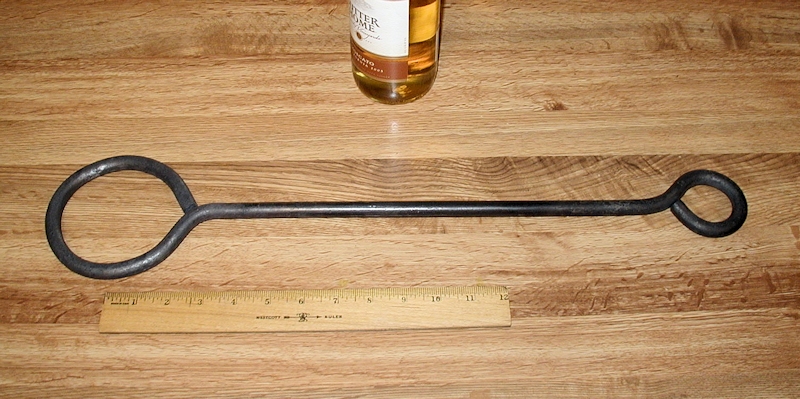
Cut a piece of 1/2" round stock to about 34 1/4" long and form it to the shape shown above.
I made punch marks at 5 3/4" and at 21 3/4" from one end. The 5 3/4" mark defines the stock for the small loop
(the "handle" end). The 21 3/4" mark defines the circle that will go around the bottle. 34 1/4" (-) 21 3/4" = 12 1/2".
This should produce a circle with a mean diameter of about 3 1/2", (ID of about 3") which is large enough for all the wine
bottles that I have separated from their bottoms.
The dimensions are not critical but a handle that is about 16" long allows you to hand hold the "cutter" tool
without gloves when removing a bottle bottom. The half inch diameter stock is a good choice because it holds the
heat well enough to get the job done smoothly.
The Lamp Mechansim
This isn't a detailed "how-to" to on making the mechanism, but there is enough information here for an advanced beginner
to do the job successfully.
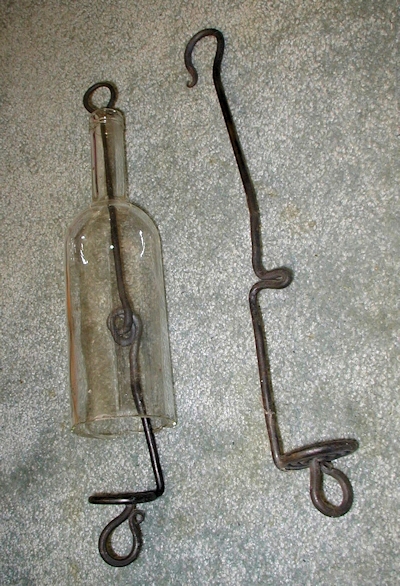
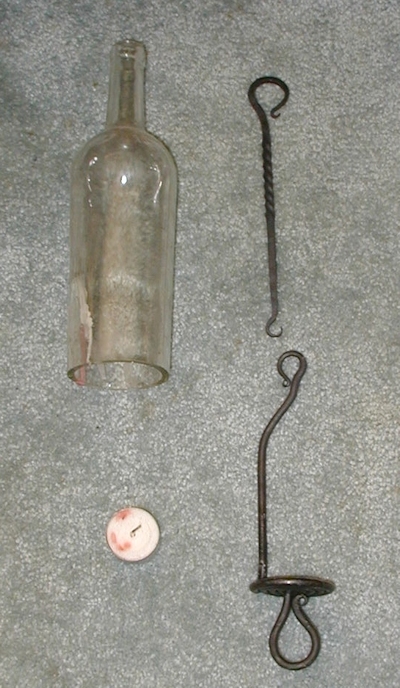
As you can see from the pictures at the top of this page, there are two styles of this lamp that I am familiar with.
The mechanism for the style on the left is all one piece.
You can see that one lamp has a simple "kink" in the rod to locate the wine bottle's neck properly. The other lamp
in the left hand picture has a "knot" tied in the stock to perform that job. It's all up to you.
To make the lamp this way, the shepard's crook that is the
hanger has to be bent to shape after the end of the rod is pushed up through the bottle. This can be a little tricky,
since you have to heat the rod while holding the whole assembly in one gloved hand, cushioning the hammer blows so
you don't break the bottle.
One-piece style-(picture at the left), up at the top of the page):
A few years after we started making the wine bottle candle lamps using the one-piece mechanism,
Guild of Metalsmiths Blacksmith Curt Engstrom devised a way to make the mechanism in two parts. The main part is the
candle-and-chimney support. The second part has a shepard's crook on one end and a smaller hook on the other. The small
hook is small enough to just barely fit through the neck of the selected wine bottle and to connect to the lower part of the
mechanism. Using this technique, there is no danger of breaking the bottle while finishing the shepard's crook.