Background:
I needed a process controller for my ongoing woodchips-to-electrical-energy project. I found that the folks at
www.gekgasifier.com have done a great job of producing a really nice datalogger/monitor/controller using an Arduino based system.
I have some electronics and a bit of programming in my background, so I thought I'd do a similar thing for myself.
Google, (what else) and Youtube provided great information about "Arduino".
As you all know, you can buy Arduino stuff from many places on the internet, but, since I still had some questions,
I thought I'd look for a "local" place to get my "starter kit" so I could ask questions there.
Anyway, I finally (not an easy task) located a Radio Shack store that had some stuff. (Not all of them do, I discovered).
Getting My Stuff:
One of the clerks said he has some limited experience in this area and offered to help me select some stuff.
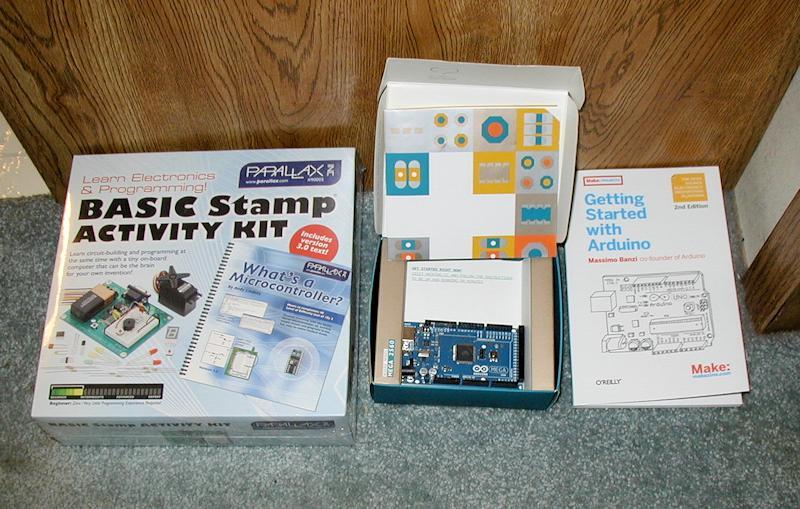
I ended up buying:
-ATMega 2560, because the guy told me it was the best and biggest.
-The book "Getting Started With Arduino" by Massimo Banzi
-and, -------- a "Basic Stamp Activity Kit" by parallax.
This store didn't have a lot of other Arduino compatible accessories like servos, and only a few sensors. But, several sensors, a servo, a 2 line display and other goodies were included in the "Stamp Kit". The clerk assured me that this kit was an Arduino accessory kit. ---Which, of course, was my first mistake. It is, apparently, a whole 'nother approach to learning micro processors. I'd take it back, but it does have many sensors and Arduino-type kit parts that I can use,---- I think.
Getting it Going:
Using the Banzi book and the arduino website (http://arduino.cc/en/Main/HomePage), I started into the process.
First problem:
Getting the software loaded onto my desktop Windows 7 computer:
Downloaded it in zipped form. My unzip program put it in a wierd place.
I didn't understand the arduino instructions about getting it to start. Mistakenly moved the .exe file to the desktop,
from where, of course, it wouldn't run. When I tried to run the file, it told me that I had to register at the JAVA site and
then download the complete JAVA development package!
Because me and Windows 7 hate eachother so much, I gave up for the night.
Next morning I performed that initial part of the installation of the Arduino IDE onto my netbook and it worked,
to the point where I could play with the IDE,so at least, I knew that the culprit was ME, somehow.
So I finally found the dialogue box where I could make Explorer un-hide the "hidden files" so I could locate my Arduino
directory
and put the .exe file back into it.
Second problem:
Finding the proper USB cable. I guess I hadn't really noticed how many different kinds of "other ends" there can
be to a USB cable. One came with the "Stamp Kit" but it was of the mini variety. I finally found one of the right
kind.
General problem1:
The ATMega2560 came with absolutely NO instructions of any kind. No cables, either. I thought that I had read that it
was the same as an UNO from a programming standpoint, but, as I looked around on the web, I got more and more worried
that it might be a totally different animal, especially since I started having all these problems.
General problem2:
As I googled around, people who had had somewhat similar problems seemed to be continually flamed for not asking their
questions correctly. These guys all seemed to use acronyms that were unknown to me an awful lot of the time, in
addition the their generally disparaging remarks.
Third problem:
Getting Windows 7 to recognize the hardware and loading the drivers. None of the instructions covered the screens that
I see on my computer. Most of the stuff was written before Win7, I guess. I was amazed when I finally found a dialogue
box that would let me point to a folder and not a file for driver installation---- and that it WORKED!---
(because none of the drivers in that folder said anything about the ATMega2560!)
Fourth problem:
I forgot the instructions to set up the com port, which drove me nuts, because I had finally gotten to the point where I could see and write code. I could attempt to download, but nothing happened. By that time I had gotten to the point where the ATMega was plugged in, and a couple of LED's were glowing. But nothing else was happening.
Fifth problem:
Now I could write code with the IDE and/or open sample programs.
The first program I ran was "Blink". It "verified" okay. It seemed to upload okay, because it started the blink program.
GREAT!, I thought, until I tried
to modify it. When I uploaded the modified program, the device seemed to accept it, and seemed to run it for one cycle,
maybe, and then reverted to the "Blink" program. I tried several different sample programs and NONE could effect the
"Blink". I Googled around some more and found a couple of instances where other ATMega2560 users seemed to say that
this "Blinking" was a fault mode for the board. Now I'm really worried.
Finally, while looking helplessly around the top menu on the Arduino "IDE" screen, I clicked the "Tools" item and
noticed the word "Board". I clicked on it and found a whole list of Arduino, etc. board types. Lo and Behold,
there was My
ATMega2560. I clicked on it and my program transfer problems were over.
Conclusion (if there can be one after only a day or so):
Don't feel sorry for me. I brought it all on myself. And things are better now. I am over the initial hurtles.
In my case, I'd have been better off to start with an Arduino UNO. Then I wouldn't have been constantly suspicious about
the differences that might have been between the UNO and the ATMega2560.
I really don't need to learn another new language for the "Stamp Kit". I don't even know if I will fire it up, but from
what I have read about it so far, it does use a form of the Basic programming language and I'm no stranger to it. Maybe
it's no different than having more than one brand of car or machine tool. Who knows?
I just hope this page helps someone else in some way.
One Month or so Later:
I feel like a seasoned novice now.
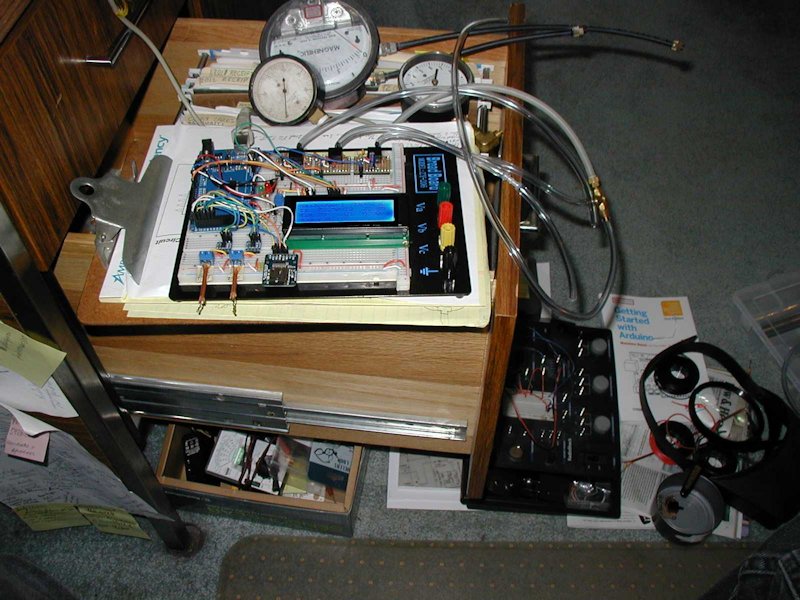
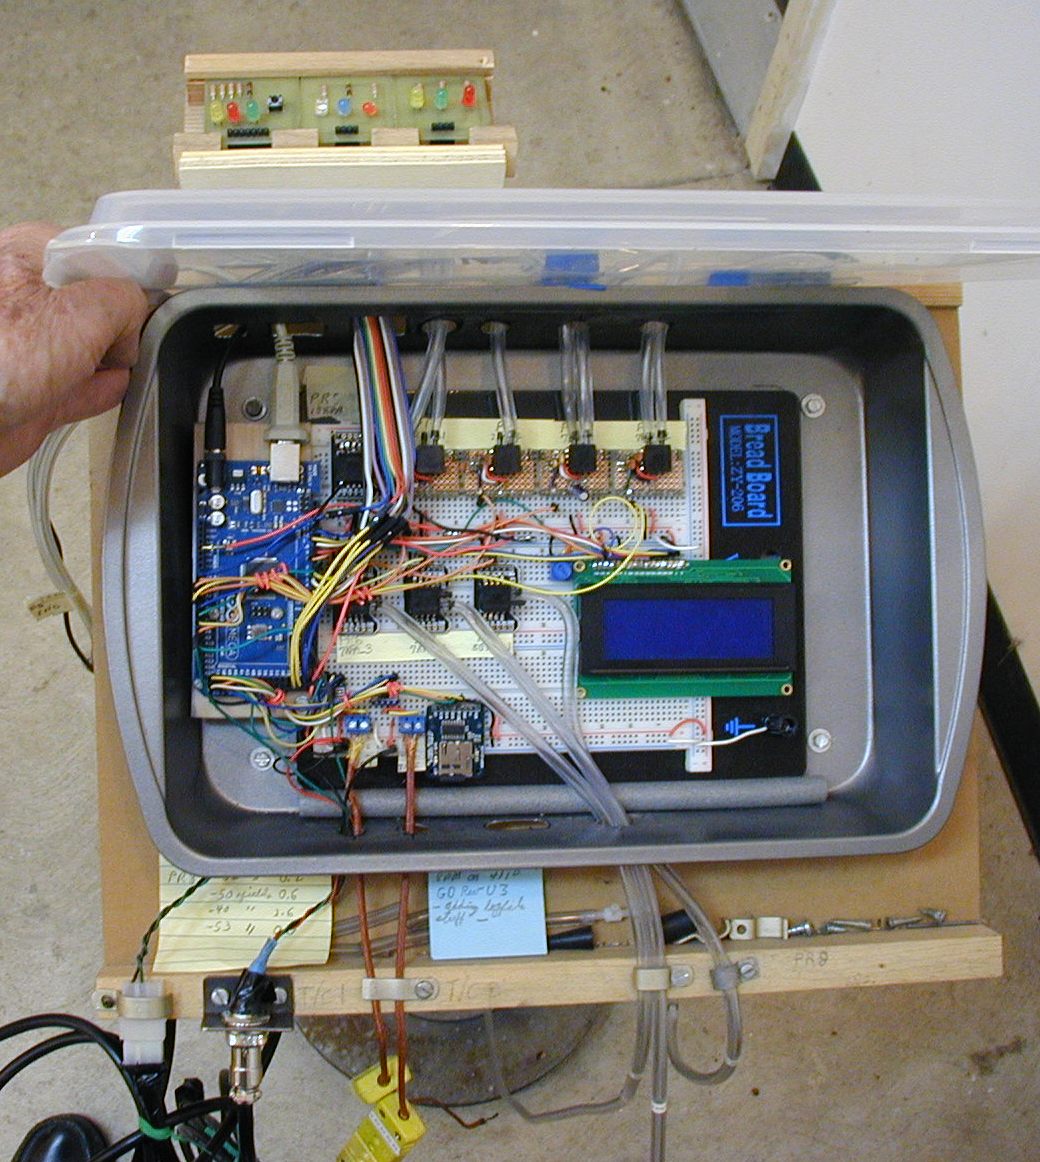
This is my breadboarded Woodgas Datalogger.
The whole thing is based on the Arduino ATMega2560.
The unit you see has the following features:
-a 4 row by 20 character display to show me what is going on as it happens.
-3 differential pressure sensors. Two of them read +/- 8 inches water column and one reads +/- 28 inches water column.
They are the little black squares at towards the top of the unit with tubing connected to them. You can see some
mechanical pressure and vacuum meters at the top of the picture; I'm using them to calibrate the sensors.
-2 type K thermocouple readers that deliver the temperature directly in either degrees F or C. The type K thermocouple can
read temps up to about 2500 degrees F. In the picture, you can see two short T/C's that are being used for testing the
circuits.
-A thermistor on board to read and log the ambient temperature.
-It has an SD card reader that can store up to 4GB of information. The information can be read by any spreadsheet
program later on for analysis.
Last couple of things to add before making smoke (connecting it up to my gasifier and lighting a fire):
-a "marker" button. Whenever I press it during a run, it will record a "mark" on the current data record being stored.
This will allow me to tie in events that I record on paper to the exact moment that all the data are being read.
-One more pressure sensor, if I need it.
-Two more thermocouple readers, if I need them.
-Add the alarm. Probably a flashing light and a beeper of some sort. I probably won't use the alarm right away
because I need to take data first before I know what conditions to program it for.